

How to replace a 24 Volt Solenoid Coil?
Replacing a 24 Volt Solenoid Coil can seem like a daunting task, especially if you're not well - versed in electrical components. As a 24 Volt Solenoid Coil supplier, I've seen many customers grappling with this issue. In this blog, I'll guide you through the step - by - step process of replacing a 24 Volt Solenoid Coil, so you can do it safely and effectively.
Understanding the 24 Volt Solenoid Coil
Before we jump into the replacement process, it's crucial to understand what a 24 Volt Solenoid Coil is and how it functions. A solenoid coil is an electromechanical device that converts electrical energy into mechanical energy. When an electric current passes through the coil, it creates a magnetic field. This magnetic field then moves a plunger or armature, which can be used to control the flow of fluids in valves or perform other mechanical tasks.
The 24 - Volt specification indicates the voltage required to operate the coil. Using the wrong voltage can damage the coil or cause it to malfunction. That's why it's essential to ensure that the replacement coil has the correct voltage rating.
Tools and Materials You'll Need
To replace a 24 Volt Solenoid Coil, you'll need the following tools and materials:
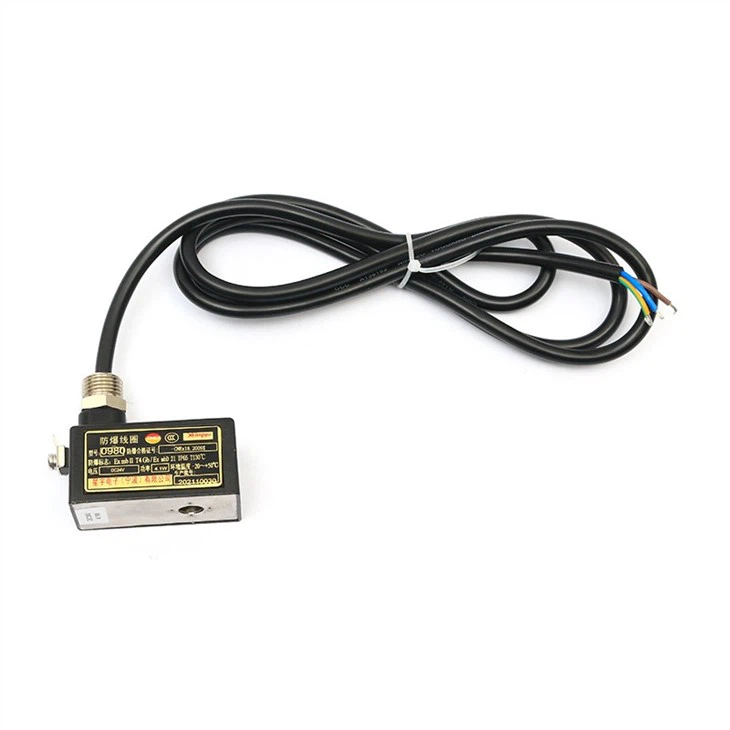

- Replacement Coil: Make sure it's a 24 - Volt coil that is compatible with your solenoid valve. You can find a wide range of 24vdc explosion proof solenoid coil on our website.
- Screwdriver: Depending on the type of solenoid valve, you may need a flat - head or Phillips - head screwdriver.
- Wire Strippers: These are used to strip the insulation from the electrical wires.
- Electrical Tape: To insulate the connections and prevent short - circuits.
- Safety Gloves and Goggles: To protect yourself from electrical shocks and any potential debris.
Step 1: Safety First
Before you start working on the solenoid coil, it's crucial to ensure your safety. Turn off the power supply to the solenoid valve. This can usually be done by switching off the circuit breaker or unplugging the device. Also, make sure to discharge any stored electrical energy in the system. Wear safety gloves and goggles to protect yourself from electrical shocks and debris.
Step 2: Identify the Solenoid Coil
Locate the solenoid coil on the valve. It is usually a cylindrical or rectangular component attached to the valve body. Look for the model and voltage rating on the existing coil. This information will help you ensure that you select the correct replacement coil.
Step 3: Remove the Old Coil
Use a screwdriver to remove the screws or bolts that hold the coil in place. Carefully lift the coil off the valve. Be gentle as you may need to disconnect the electrical wires attached to the coil. Use wire strippers to carefully remove the insulation from the wires, exposing the metal conductors.
Step 4: Inspect the Valve and Wires
Once the old coil is removed, inspect the valve body for any signs of damage or wear. Check the electrical wires for fraying, corrosion, or other issues. If you notice any problems with the wires, it's a good idea to replace them at the same time.
Step 5: Install the New Coil
Take the new 24 - Volt solenoid coil and align it with the valve body. Insert the plunger or armature of the coil into the valve if applicable. Secure the coil in place using the screws or bolts you removed earlier.
Step 6: Connect the Electrical Wires
Connect the electrical wires to the new coil. Make sure to match the wire colors or markings to ensure the correct polarity. If there are no color - coding or markings, refer to the manufacturer's instructions. Once the wires are connected, use electrical tape to insulate the connections and prevent short - circuits.
Step 7: Test the Solenoid Valve
After installing the new coil and connecting the wires, restore the power supply. Test the solenoid valve to make sure it's working correctly. You can do this by operating the valve manually or using the control system. If the valve doesn't work, double - check the connections and make sure the coil is the correct voltage.
Troubleshooting Tips
If you encounter any problems during the replacement process or after testing the valve, here are some troubleshooting tips:
- No Power: Check the circuit breaker or power supply to make sure the valve is getting power.
- Coil Overheating: This could be due to using the wrong voltage or a short - circuit in the wiring. Check the voltage rating of the coil and inspect the wires for damage.
- Valve Not Opening or Closing: Make sure the coil is installed correctly and the plunger or armature is moving freely. There could also be an issue with the valve itself, such as a blocked or damaged component.
Other Solenoid Coil Options
In addition to the 24 - Volt solenoid coils, we also offer 220V AC Solenoid Valve Coil and ex proof 220vac solenoid coil. These coils are suitable for different applications and voltage requirements. Whether you need a coil for a standard industrial application or an explosion - proof environment, we have the right product for you.
Conclusion
Replacing a 24 Volt Solenoid Coil is a task that can be accomplished with the right tools, knowledge, and safety precautions. By following the steps outlined in this blog, you can replace the coil safely and ensure that your solenoid valve operates correctly.
If you're in the market for high - quality 24 - Volt solenoid coils or have any questions about the replacement process, don't hesitate to contact us. We're here to assist you with your purchasing decisions and provide you with the best products and support.
References
- Electrical Installation Handbook by Schneider Electric
- Solenoid Valve Handbook by Asco